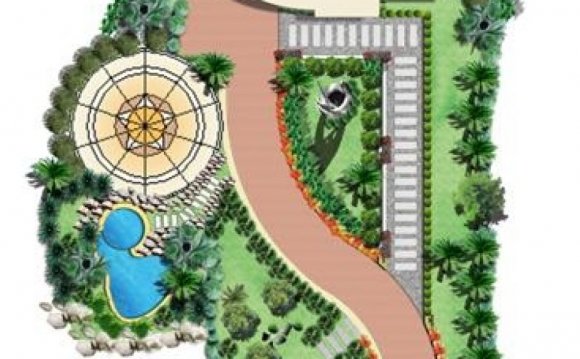
Putting plan to paper (or computer) is crucial in designing your landscape. If you're working on a simple project, graph and tracing paper might be all you need. A professional landscape designer starts with a property survey and topographical map, and then typically creates a series of conceptual sketches, preliminary elevations and final renderings as your vision evolves and crystallizes.
Tip: In one corner of the paper, include a compass to remind you of sunlight and shadow patterns.
Now you get to play around. To audition various concepts, use tracing paper overlays or multiple photo or electronic copies that allow you to try out with different form compositions, paths and proportions.
It's not too early to include elements such as shrubs and patios drawn to scale and placed in different configurations on the grid. Don't overlook the practical details, such as the placement of irrigation and lighting systems, running electricity to the pond pump (or can you go solar?) and access (can you get the wheelbarrow down the stone steps?).
Once you settle on a basic traffic pattern and the "bones" of the space, the fun begins as cryptic labels morph into cute green blobs, colorful flower beds and paver patterns. As in decorating a room, visualize how the colors, shapes, textures and patterns will work together.
Landscape plans use symbols to indicate plants, hardscape materials, trees and architectural features. The symbols are not standardized so whatever you use, make sure they mean the same thing to you and your landscape designer. They should be simple yet suggestive of the actual appearance of the landscape features.
For example, hardscape areas should resemble the material and pattern to be usedzigzag rectangles for herringbone brick, random amoeba shapes for flag stone, little dots for gravel, and so on. Whether you color code or number the symbols, double check the final draft of your plan to make sure you have the right symbol in the right place.


